Few dishes capture simple, everyday comfort like Japanese Salted Salmon. With just salmon, salt, and sake, this recipe turns fresh fish into a deeply flavorful meal with crispy skin and savory umami that pairs perfectly with steamed rice. It’s a classic you’ll often find in Japanese breakfasts, bento boxes, or tucked into onigiri rice balls.
Why I Love Making This Dish at Home
For years, I used to pick up ready-made salted salmon from Japanese markets. It was convenient, but often a bit too salty. Once I started making my own, I realized how much better it tasted — and how much control I had over the flavor.
My kids love the crispy skin, and I love that I can prepare a batch ahead of time, freeze it, and have salmon ready for quick meals. It’s one of those dishes that feels traditional yet incredibly practical for everyday cooking.
Ingredients You’ll Need
-
Salmon fillets – Sockeye salmon is ideal since it’s firmer and less fatty, but any good-quality salmon works.
-
Salt – Kosher salt is best for even seasoning.
-
Sake – Used to clean the fish and reduce any fishy odor.
That’s all you need — just three ingredients!
Step by Step Instructions
-
Clean the salmon – Pour sake over the fillets and let them rest for about 10 minutes. Pat dry with paper towels.
-
Salt generously – Sprinkle salt evenly over both sides, focusing on the skin. This enhances flavor and helps firm the flesh.
-
Refrigerate – Wrap salmon in layers of paper towels and store in an airtight container in the fridge for 2 days. This step allows the flavors to deepen.
-
Freeze if storing – After curing, wrap portions individually and freeze for later.
-
Cook – Broil, grill, or pan-fry until the salmon is cooked through with crispy skin.
Tips for Success
-
Cut fillets thin – Japanese-style fillets are smaller and thinner than Western cuts. They cook faster and crisp beautifully.
-
Don’t skimp on salt – It’s the key to flavor and preservation. Adjust amounts based on whether you want a mild or stronger cure.
-
Use sake for balance – Even if you’re not a sake drinker, it works wonders at cleaning the fish and mellowing flavors.
-
Batch prep – Make several fillets at once so you always have salted salmon ready in the freezer.
Serving Ideas
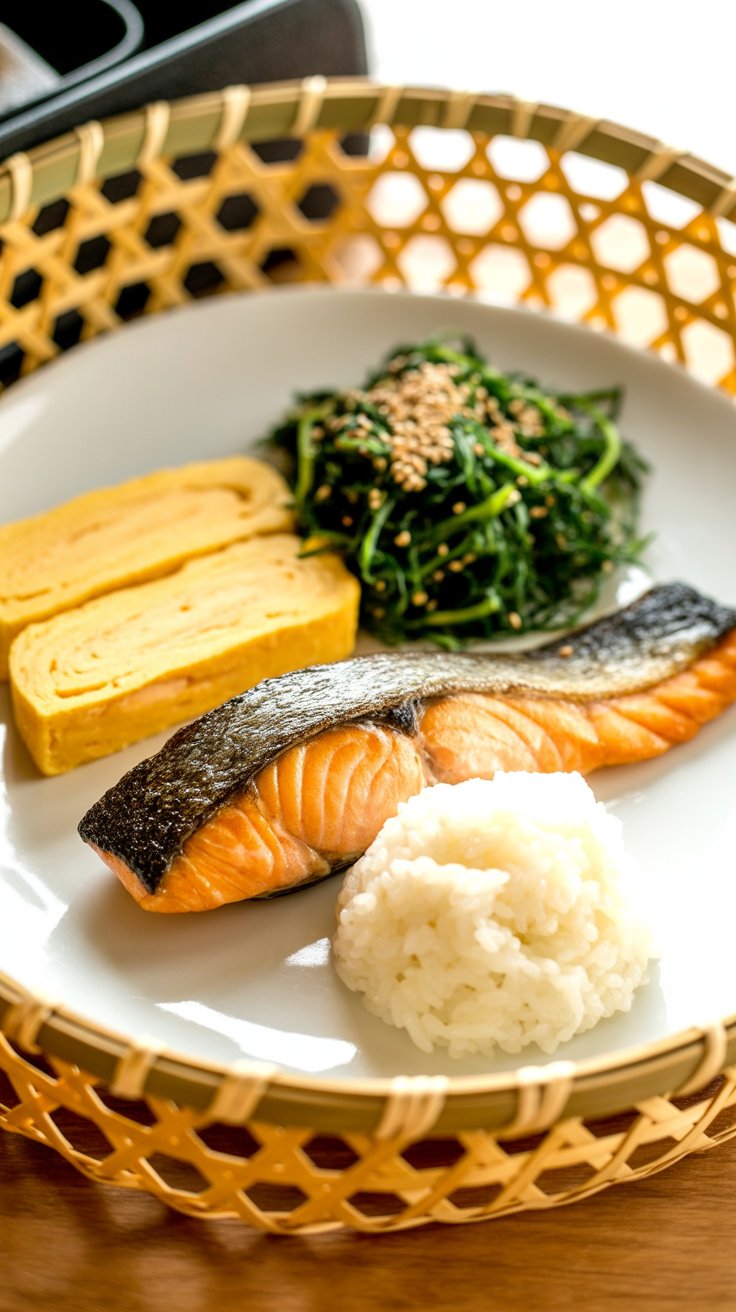
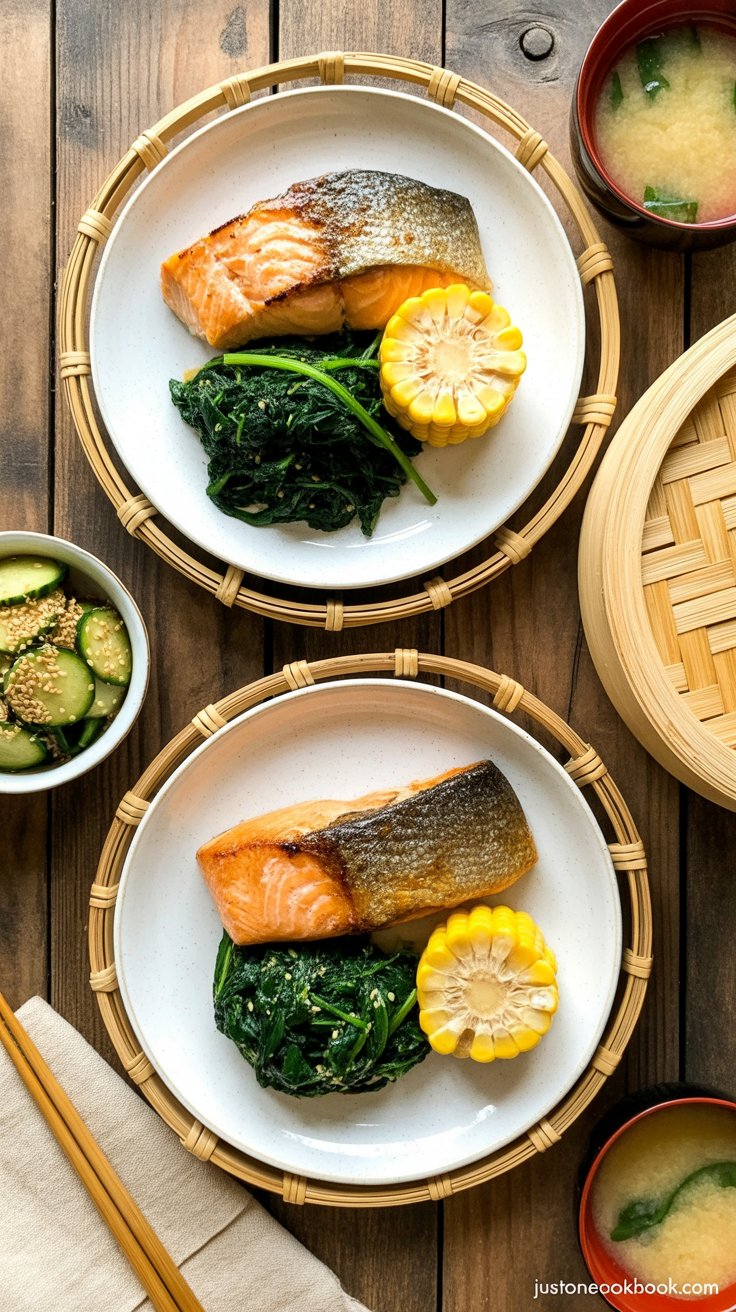
Traditionally, salted salmon is served as part of a Japanese breakfast alongside steamed rice, miso soup, tamagoyaki (rolled omelet), and a vegetable side. It’s also delicious in:
-
Onigiri (rice balls) – Tucked inside for a savory filling.
-
Bento lunches – Easy to pack and enjoy cold or reheated.
-
Ochazuke – Salmon flaked over rice with hot green tea poured on top.
-
Fried rice or porridge – Adds a salty, umami kick to simple rice dishes.
Storage
-
Fridge – Cured salmon keeps for 2–3 days before cooking.
-
Freezer – Wrap tightly in plastic and freeze for up to 1 month. Thaw in the fridge overnight before cooking.

FAQs
Do I have to use sake?
No, but it really helps neutralize fishy odors. If you prefer not to use alcohol, you can skip it.
What if the salmon tastes too salty?
Soak it briefly in a mix of sake and mirin (2:1 ratio) for a few hours in the fridge before cooking. This reduces the saltiness without drying out the fish.
How much salt should I use?
Traditionally, 5% salt by weight of the fish is standard. For a milder version, aim for 3–4%.
Can I use frozen salmon fillets?
Yes, just thaw completely and pat dry before starting the curing process.
What cooking method is best?
Broiling or grilling gives the best crispy skin, but pan-frying in a little oil works well too.
Japanese Salted Salmon

A beloved classic in Japanese home cooking, salted salmon is simple yet deeply flavorful.
Ingredients
- 1.3 lb salmon fillet, skin on (sockeye or Atlantic works well; cut into Japanese-style portions)
- 1–2 tablespoons sake
- 3 tablespoons kosher salt (or 5% of the salmon’s weight in salt)
For Serving
- 2 inches daikon radish, grated
Instructions
- If starting with a whole side of salmon, cut it into Japanese-style fillets: place the fish skin-side down, trim the narrow tail, then slice diagonally toward the tail at about a 30° angle. This amount of salmon typically yields 8 fillets and a few smaller offcuts.
- Sprinkle sake over the fillets and rub it in evenly. Let sit for 10 minutes, then pat dry with paper towels. Coat the skin side first with salt, then season both sides generously. Press the salt gently into the flesh.
- Line the bottom of an airtight container with paper towels. Arrange the salted salmon in a single layer, add another sheet of paper towel, and continue layering if needed. Cover with a final sheet and close tightly. Refrigerate for 2 days. The salt will draw out moisture, leaving the salmon darker and firmer. Pat dry before cooking.
- If not cooking immediately, wrap fillets individually (or in pairs separated by plastic) and place in a freezer bag. They keep well for up to 1 month. Thaw overnight in the refrigerator before cooking.
- Broil (recommended): Preheat the broiler on high for 5 minutes. Place salmon skin-side up on a foil-lined tray and cook for 8–10 minutes, until well done.
- Bake: Heat the oven to 425°F (218°C) and cook for 10–12 minutes.
- Grill: Cook over medium heat for about 5 minutes per side until flaky.
- Serve hot with grated daikon radish on the side. This dish pairs beautifully with steamed rice, tamagoyaki, and simple vegetable sides.
Notes
- Leftovers keep in the fridge for up to 3 days, or in the freezer for 2 weeks (if the fish wasn’t frozen before salting).
Nutrition Information
Yield
8Serving Size
1Amount Per Serving Calories 196Total Fat 9gSaturated Fat 2gTrans Fat 0gUnsaturated Fat 7gCholesterol 46mgSodium 1473mgCarbohydrates 4gFiber 1gSugar 2gProtein 17g
Easy Shrimp Recipes.com, occasionally offers nutritional information for recipes contained on this site. This information is provided as a courtesy and is an estimate only. This information comes from online calculators. Although allchickenrecipes.com attempts to provide accurate nutritional information, these figures are only estimates.
Final Thought
This Japanese Salted Salmon is proof that simple ingredients can make the most satisfying meals. Whether you serve it with rice and miso soup for breakfast or pack it into onigiri for lunch, it’s a dish that never loses its appeal. Once you try making it yourself, you’ll probably never go back to store-bought.

