If you’re craving sushi but don’t feel like rolling anything, this Spicy Salmon Sushi Bake is the answer. It’s everything you love about a spicy salmon roll—creamy, savory, a little spicy, and loaded with flavor—layered into a comforting casserole you can bake and serve family-style. Perfect for casual dinners, potlucks, or game nights, this is the kind of dish that disappears fast.

Why You’ll Love This Recipe
- No rolling required – Just layer, bake, and serve.
- Big sushi flavor – With seasoned rice, creamy spicy salmon, and furikake, every bite delivers.
- Easy to customize – Use tuna, crab, or even smoked salmon.
- Feeds a crowd – Serve with seaweed sheets for a fun, hands-on dinner or appetizer.
Ingredients You’ll Need
For the Sushi Rice
- Sushi rice – Look for short-grain Japanese or Calrose rice. Sticky texture is key.
- Rice vinegar – Adds classic tanginess to the rice.
- Sugar & salt – For seasoning the rice, unless using seasoned vinegar.
For the Spicy Salmon Layer
- Salmon fillets – Skinless, boneless, cooked and flaked. Fresh is best, but canned or leftover salmon works.
- Kewpie mayonnaise – Rich and creamy, but regular mayo works too.
- Cream cheese – Makes the filling ultra creamy.
- Sriracha – Or any hot sauce you like, for that kick of heat.
- Soy sauce – Or tamari for a gluten-free option.
To Layer and Finish
- Furikake – A must for that classic sushi flavor. It’s a savory sprinkle of seaweed, sesame, and seasoning.
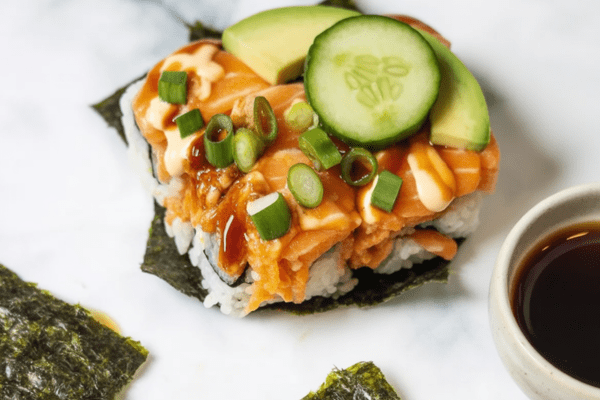
- Nori sheets – Cut into squares for scooping and eating—like sushi tacos!
- Toppings (optional) – Sliced green onions, sesame seeds, avocado, cucumber, unagi sauce, pickled ginger, or tobiko.

How to Make Spicy Salmon Sushi Bake
1. Cook the Rice
Rinse your sushi rice well to remove excess starch, then cook according to package directions. Once done, season with rice vinegar, sugar, and salt while it’s still warm. Gently fluff to mix.
2. Prep the Salmon
Rub the salmon fillets with soy sauce and cook until just done—either in the oven at 400°F for 15–20 minutes or in an air fryer at 400°F for about 10 minutes. Flake into small chunks.
3. Mix the Spicy Salmon
In a bowl, stir together the cooked salmon, cream cheese, Kewpie mayo, and sriracha until creamy and well combined.
4. Assemble the Sushi Bake
Preheat oven to 425°F. Lightly grease or line a square (9×9″) baking dish.
- Press the sushi rice into an even layer on the bottom. Wet your fingers with water to keep it from sticking.
- Sprinkle a generous layer of furikake over the rice.
- Spread the spicy salmon mixture over the furikake.
5. Bake and Top
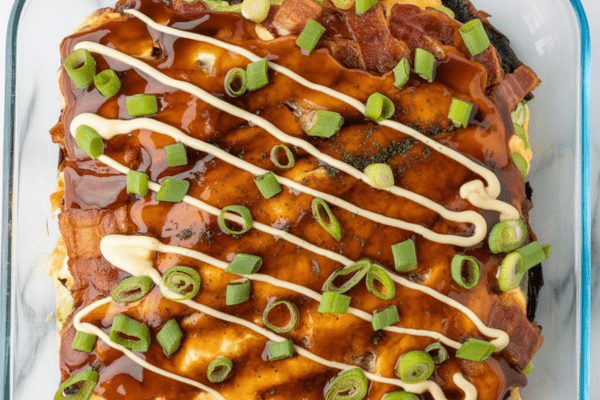
Bake uncovered for 15 minutes, or until the top is slightly golden and bubbly. Once out of the oven, drizzle with extra spicy mayo and add your favorite toppings like green onions, avocado, or unagi sauce.
6. Serve and Enjoy
Cut into squares or scoop onto nori sheets for a handheld sushi bite. It’s casual, cozy, and so much fun to eat.
Helpful Tips
- Rinse your rice well – This keeps it sticky but not gummy.
- Make it ahead – You can cook the rice and salmon a day early.
- Wet your hands – When pressing rice into the pan, damp hands make it easy.
- Don’t skip the furikake – It ties the whole sushi flavor together.
- Try it warm or cold – This dish is delicious either way.
Variations to Try
- Tuna sushi bake – Swap salmon for canned or fresh cooked tuna.
- Crab sushi bake – Use imitation or real crab for a California roll twist.
- Shrimp sushi bake – Cooked shrimp adds a sweet, briny bite.
- Smoked salmon – Adds rich, savory depth.
- Veggie version – Add roasted carrots, sweet potato, or avocado slices.
How to Store Leftovers
- Fridge – Store in an airtight container for up to 2 days.
- Reheat – Warm in the oven at 350°F or in the microwave until hot.
- Serve leftovers cold – Also delicious right out of the fridge, like cold sushi.

FAQs
Is it gluten-free?
Yes—just use tamari or gluten-free soy sauce and double-check your furikake brand.
Can I make it ahead?
Yes. Assemble everything and refrigerate, then bake right before serving.
How do you eat it?
Scoop warm or cold onto nori sheets and eat like a mini taco.
Final Thoughts
This spicy salmon sushi bake is pure comfort food with a sushi twist. It’s rich, savory, a little spicy, and completely satisfying—perfect for feeding a hungry crew or indulging in a cozy night in. Once you try it, you’ll find yourself coming back to it any time a sushi craving hits.
Spicy Salmon Sushi Bake

This spicy salmon sushi bake is your go-to when you're craving sushi flavors without the hassle of rolling.
Ingredients
- 1 cup sushi rice
- 1/4 cup rice wine vinegar
- 2 teaspoons sugar
- 1/4 cup cream cheese, softened
- 1 teaspoon salt
- 2 tablespoons sriracha or sambal oelek
- 1/2 cup furikake seasoning
- 1 avocado, sliced or cubed
- 1/2 cucumber, sliced or cubed
- 2 green onions, sliced
- 1/4 cup mayonnaise
- 8 oz salmon fillets (about 2 pieces)
- 1 tablespoon soy sauce (use gluten-free or tamari if needed)
- Nori seaweed sheets
- Extra Kewpie mayo
- Unagi sauce
Instructions
- Start by rinsing the sushi rice well under cold water using a fine mesh sieve. Cook the rice following the package directions—this typically takes about 20 minutes. Once cooked, sprinkle the rice vinegar, sugar, and salt over the rice and gently fold it in using a rice paddle or spatula.
- While the rice is cooking, season the salmon fillets with soy sauce. Cook the salmon in an air fryer at 400°F for about 10 minutes or bake in the oven at the same temperature for 15–20 minutes, depending on thickness.
- Once the salmon is done, flake it apart using a fork. Combine it in a large bowl with the cream cheese, mayo, and sriracha until smooth and well mixed.
- Preheat the oven to 425°F. Line a 9-inch baking dish with parchment paper or lightly coat it with cooking spray.
- Spread the cooked sushi rice evenly into the baking dish and press it down. Sprinkle furikake seasoning generously over the rice.
- Layer the salmon mixture on top of the rice and smooth it out evenly. Bake for 15 minutes, just until it’s heated through and bubbling a bit on the surface.
- Once out of the oven, top the bake with more mayo, sliced green onions, avocado, and cucumber. Cut into portions and serve with pieces of nori on the side.
Notes
- For the rice, always rinse thoroughly in cold water using a fine mesh strainer to get rid of excess starch. This helps you get that perfect sticky texture without turning mushy.
- If you want to save time, cook the rice a day ahead or use leftover rice. Wetting your hands with water before pressing the rice into the pan will stop it from sticking to your fingers. A rice cooker can make the process even simpler.
- If you're feeling creative, you can make your own furikake by toasting ¼ cup each of sesame seeds and crushed nori over low heat until fragrant, then stirring in two teaspoons of sugar and one teaspoon of salt. Any leftovers will keep well in an airtight container in the fridge for up to two days.
Nutrition Information
Yield
6Serving Size
1Amount Per Serving Calories 342Total Fat 24gSaturated Fat 5gTrans Fat 0gUnsaturated Fat 17gCholesterol 38mgSodium 1152mgCarbohydrates 20gFiber 3gSugar 8gProtein 12g
Easy Shrimp Recipes.com, occasionally offers nutritional information for recipes contained on this site. This information is provided as a courtesy and is an estimate only. This information comes from online calculators. Although allchickenrecipes.com attempts to provide accurate nutritional information, these figures are only estimates.

